How to create landing pages using the (Show Title and Feature Image) feature in Ghost CMS.
Creating a captivating landing page is vital for online success. With Ghost CMS's new feature, designing a unique and visually appealing page is now effortless.
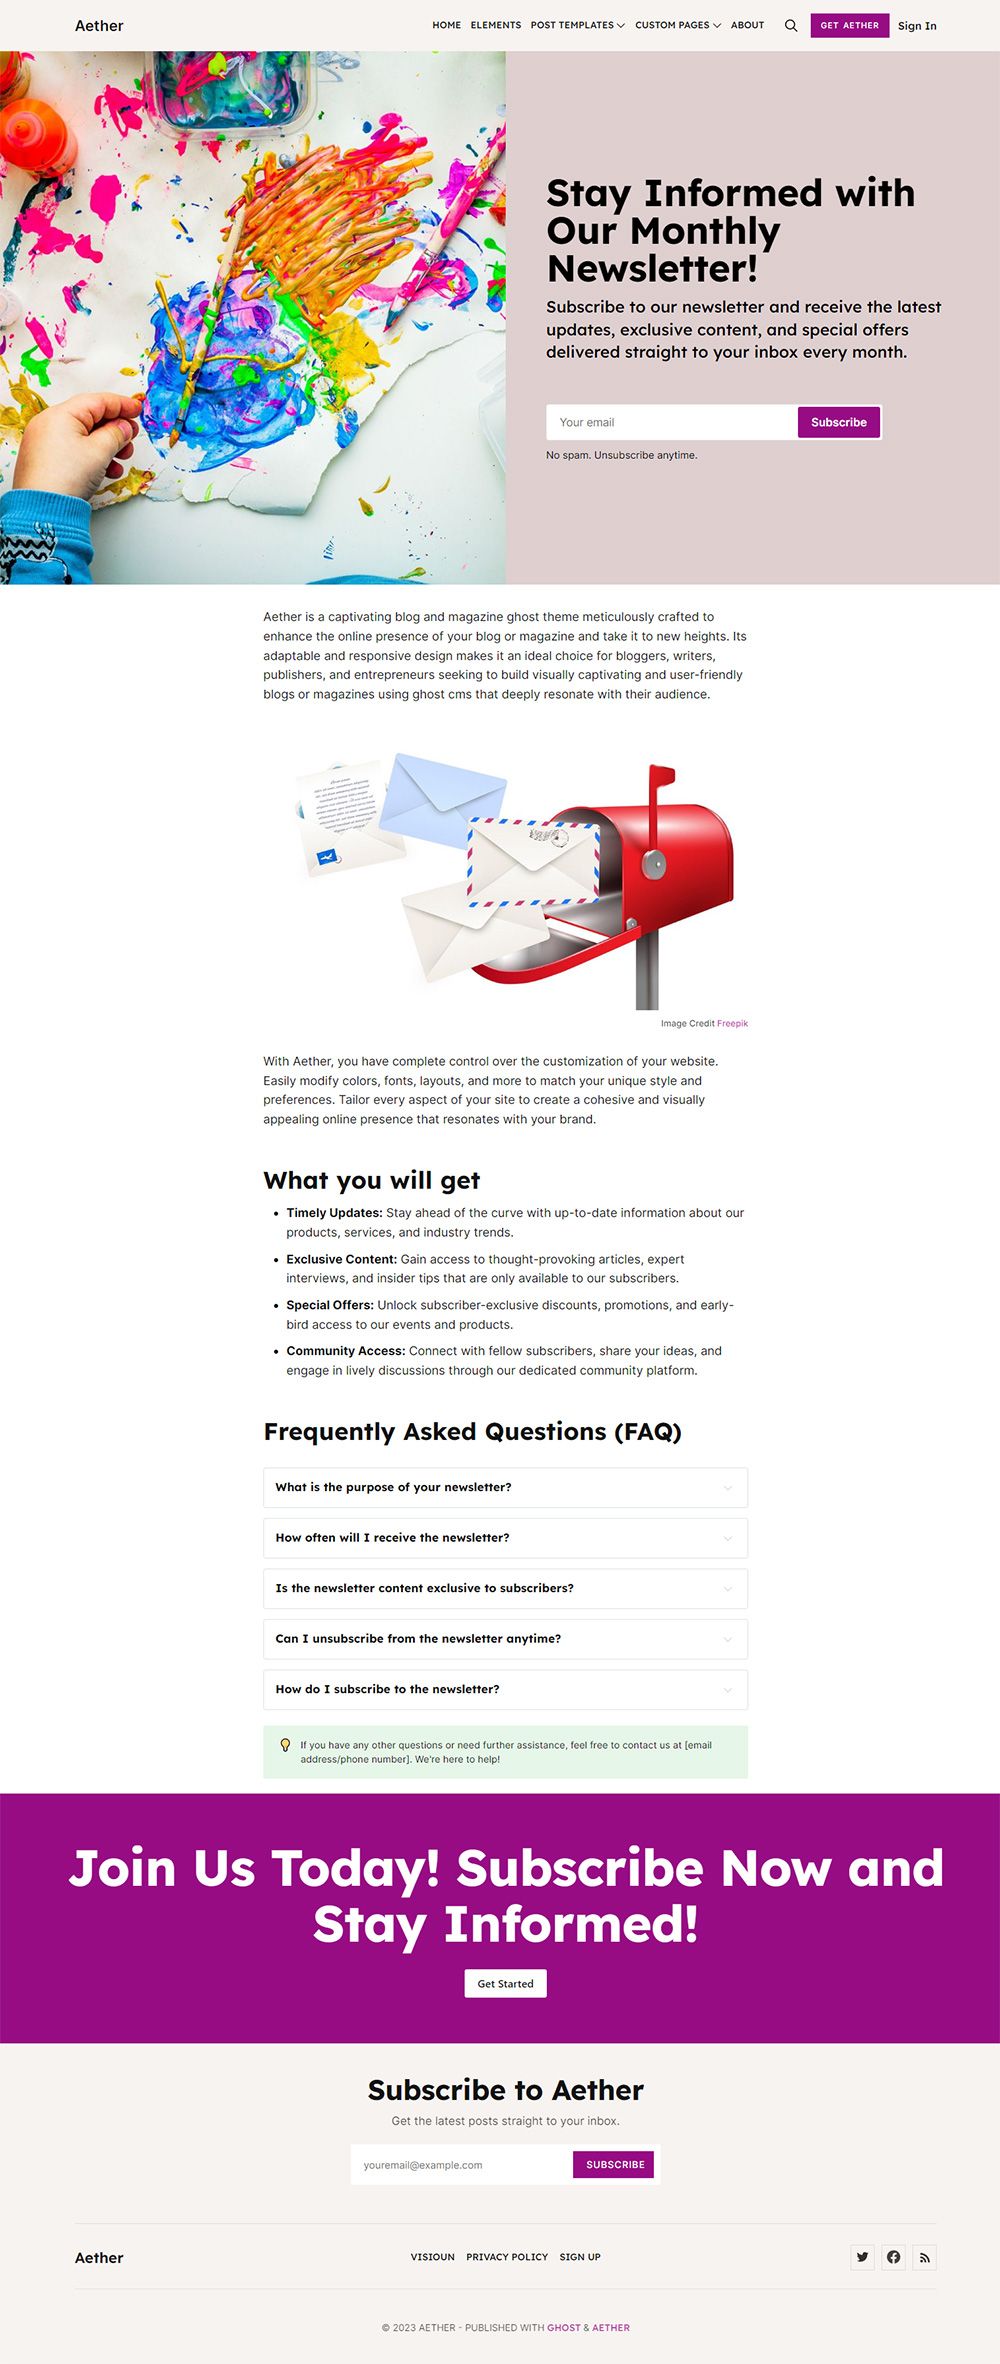
In this step-by-step guide, we'll walk you through how to leverage the new "Show Title and Feature Image" feature in Ghost to craft a captivating landing page that leaves a lasting impression.
Step 1: Update to Ghost Beta Editor
Before we begin, ensure you're using the Ghost Beta Editor to take advantage of the new feature.
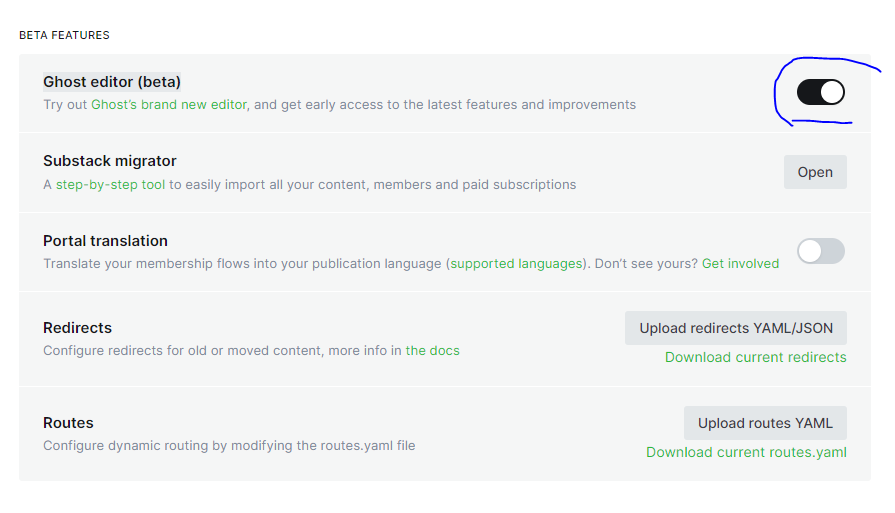
If you haven't already, upgrade your Ghost installation to access the latest enhancements & turn on the Beta Editor by going to "Setting" > "Labs" Under "Beta Feature" turn on the "Ghost editor (beta)"
Step 2: Updating the theme
Since this is a new feature, you have to update your theme codes in order to make this feature work. to do that you have to do some changes to your themes page.hbs file. Below is an example of how it's been implemented on the Casper theme.
{{#match @page.show_title_and_feature_image}}
        <header class="article-header gh-canvas">

            <h1 class="article-title">{{title}}</h1>

            {{#if feature_image}}
                <figure class="article-image">
                    {{!-- This is a responsive image, it loads different sizes depending on device
                    https://medium.freecodecamp.org/a-guide-to-responsive-images-with-ready-to-use-templates-c400bd65c433 --}}
                    <img
                        srcset="{{img_url feature_image size="s"}} 300w,
                                {{img_url feature_image size="m"}} 600w,
                                {{img_url feature_image size="l"}} 1000w,
                                {{img_url feature_image size="xl"}} 2000w"
                        sizes="(min-width: 1400px) 1400px, 92vw"
                        src="{{img_url feature_image size="xl"}}"
                        alt="{{#if feature_image_alt}}{{feature_image_alt}}{{else}}{{title}}{{/if}}"
                    />
                    {{#if feature_image_caption}}
                        <figcaption>{{feature_image_caption}}</figcaption>
                    {{/if}}
                </figure>
            {{/if}}

        </header>
{{/match}} Visioun
Step 3: Creating the Landing page
Log in to your Ghost admin dashboard and navigate to "Pages" from the left-hand menu. Click on "New Page" to start building your landing page.
Accessing Page Settings
Go to page settings by clicking the icon on the top right corner of the ghost editor. Scroll down & you will see "Show Title and Feature Image".
It's visible by default, you have to turn it off to make the page act as a landing page.
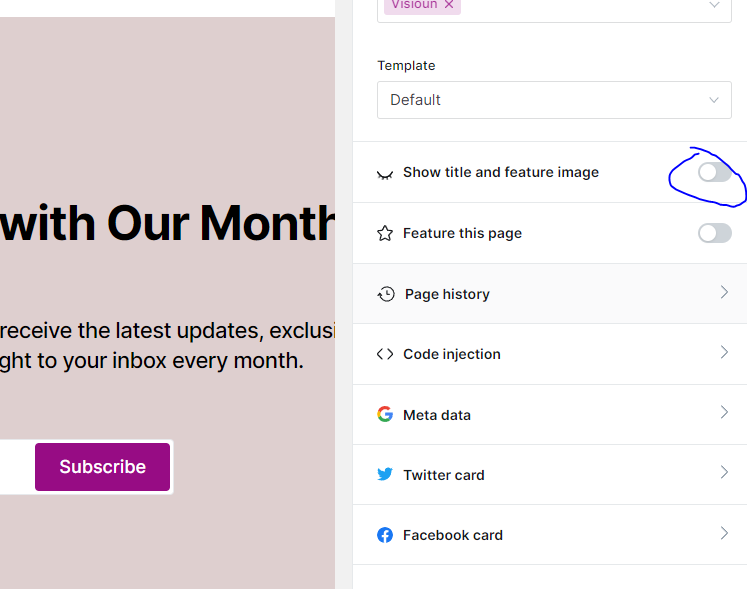
This will remove the title and feature image from your landing page, providing a clean canvas to work with.
Crafting Your Landing Page Content
With a blank canvas in front of you, it's time to let your creativity run wild. Utilize the dynamic cards provided in the editor to design your very own landing page. Here are a few suggestions to inspire your creativity:
- Header Card: Grab attention with a bold and impactful header that communicates your message concisely.
- Signup Card: Encourage user engagement and conversions with compelling CTAs placed strategically throughout the page.
- Images: Incorporate visually stunning images that align with your brand and enhance the overall aesthetics.
- Toggle Card: Create interactive elements using toggles to display additional information or features.
- Callout Card: Highlight informative content with a background color & a nice emoji.
- HTML Card: If you are comfortable with HTML, with this card you can create HTML snippets for various use.
- Product Card: Showcase your product with a nice image, a little bit of text, a rating & a link to the product.
There are some more dynamic blocks (Cards) to utilize & make a perfect landing page for your use case.
For more examples & information visit the Ghost official changelog page below:
 Changelog
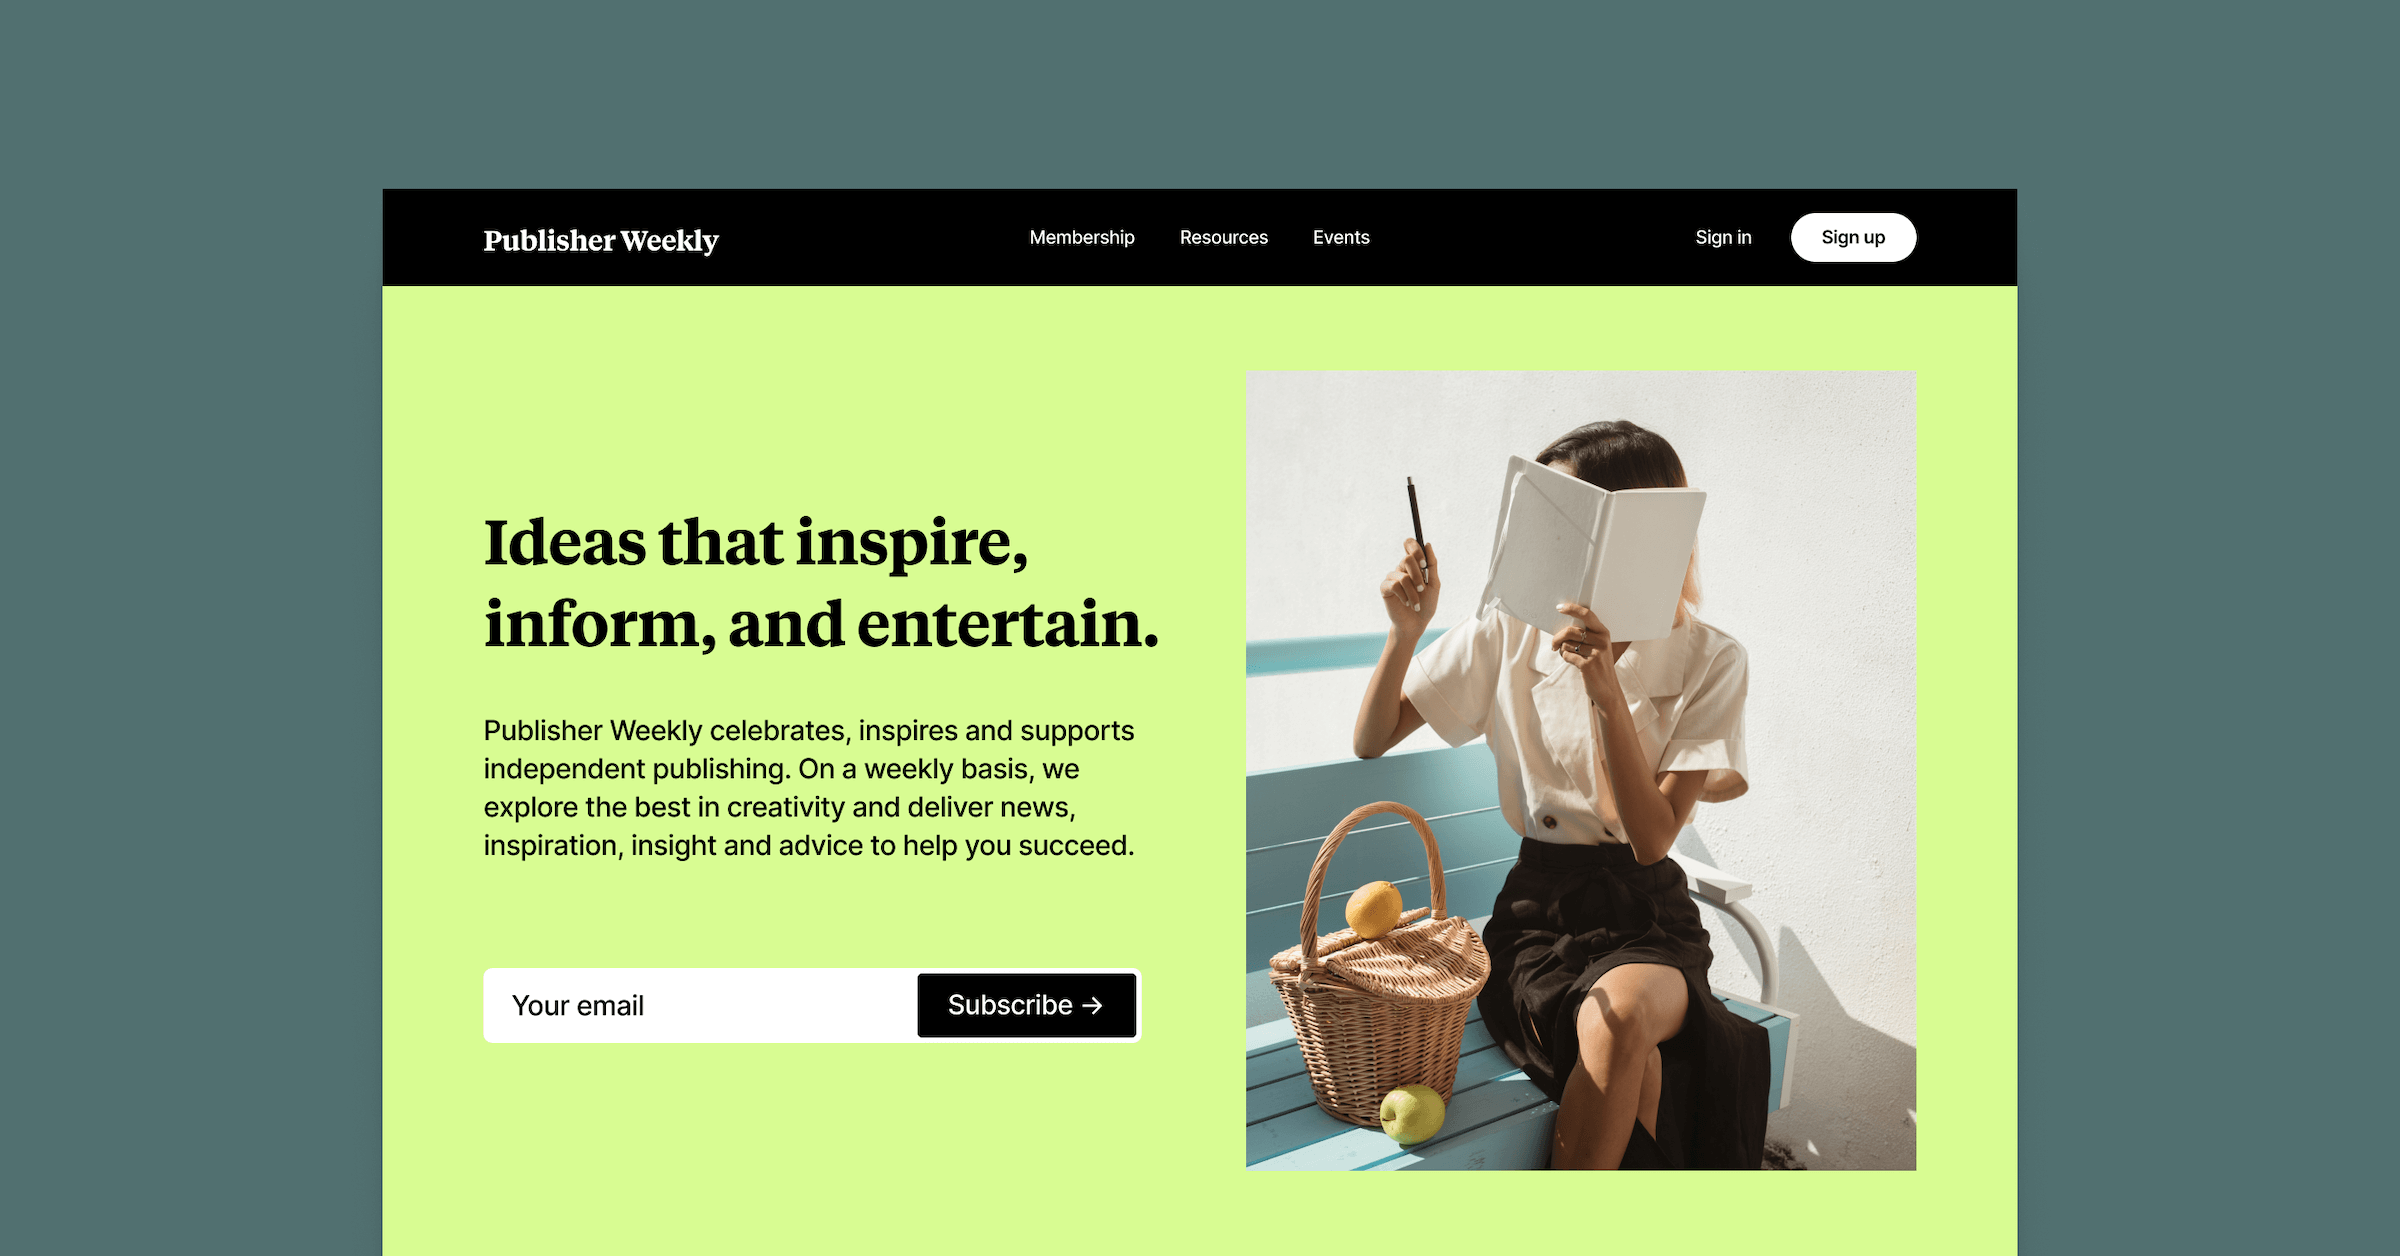
Step 4: Preview and Optimize
Once you've built your landing page, utilize the "Preview" feature to see how it appears to visitors. Check for any formatting or content issues and optimize accordingly for a seamless user experience across devices.
Step 5: Publish Your Landing Page
When you're satisfied with your masterpiece, hit the "Publish" button to make your landing page live. Share the link on your social media channels, newsletters, or anywhere else you want to drive traffic and achieve your conversion goals.
With the new "Show Title and Feature Image" feature in Ghost CMS, creating a captivating landing page has never been easier. By leveraging dynamic cards, you can design a landing page that aligns with your brand and resonates with your audience. So, unleash your creativity, utilize the power of Ghost, and craft landing pages that leave a lasting impression on your visitors.
Remember, continuous improvement is key; gather feedback, analyze performance metrics, and refine your landing page to ensure it continues to drive success for your online presence.
Happy landing page building!