Replace LetsEncrypt SSL with CloudFlare SSL for your Ghost Publication
LetsEncrypt is a great source of Free SSL certificate. But when you use CloudFlare to host your DNS, there are some problems we are facing while issuing the SSL.
As a ghost theme producer Been working with ghost publications for many years & faced issues often while issuing Letsencrypt SSL.
The main issue, Letsencrypt can not authenticate your domain when the WWW or A record is Proxied. So you have to turn the Entry record to DNS only from Proxied. & then you can issue a Certificate.
Another issue is LE SSL renews every 90 days. & If you are using the proxied option on your DNS record then LE fails to renew the Certificate.
So the Better option is to use Cloudflare Generated SSL for your Ghost Publication if you use Cloudflare as your DNS provider. To replace LE SSL with CloudFlare SSL follow the steps below
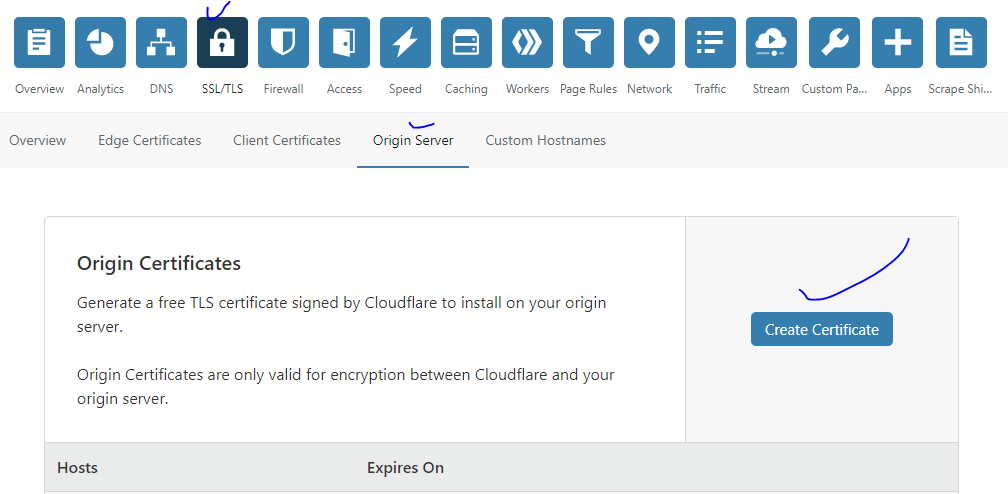
Create CloudFlare SSL
Login to CloudFlare Account, then go to the SSL Tab > Origin Server > Click Create Certificate
On the next screen keep the setting default & then press Next
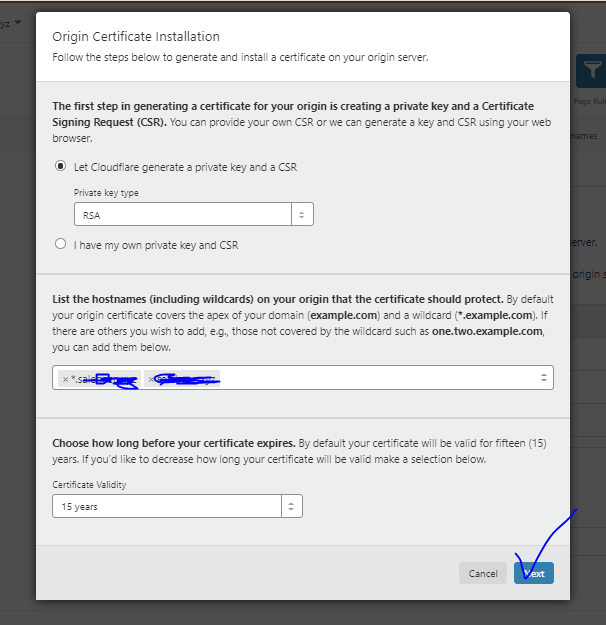
SSL is Created & on the next screen, you will see the Certificate & Private Key.
Copy the Certificate & save it to your computer as cert.pem & also copy the Key & save it as key.pem
& the Hit OK
So the first part is done.
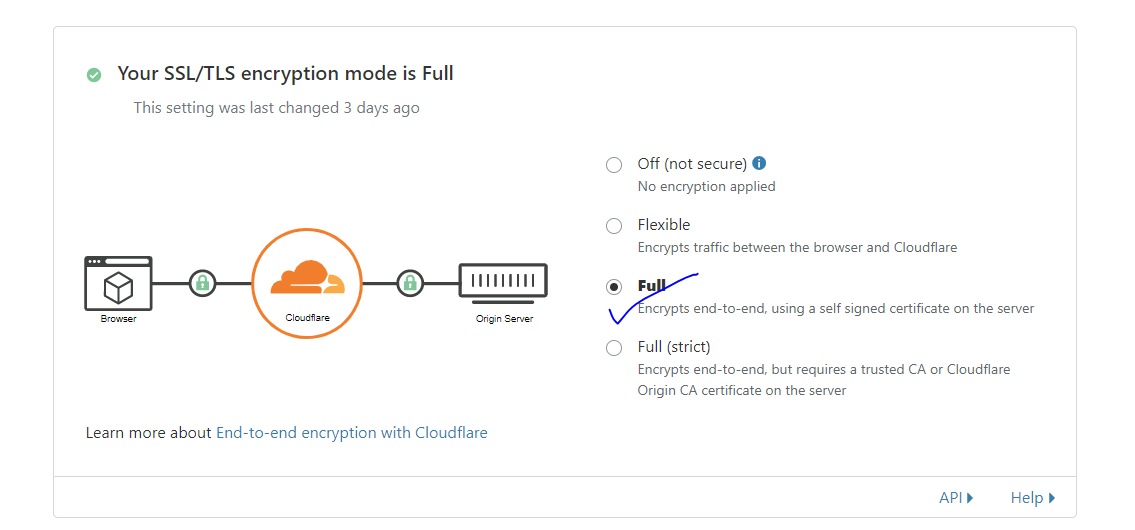
Now go to SSL > Overview & Check the Mode to Full
Add the certificate to your server
Now it's time to upload the certificate to your server & configure nginx to use CloudFlare SSL.
Login into your server via SSH
ssh user@yourserveripCopy the file ( key.pem & cert.pem ) to /etc/ssl/ or you can directly create file files under the /etc/ssl/ folder by
# Creating the cert.pem
sudo nano /etc/ssl/cert.pem

# Creating the key.pem
sudo nano /etc/ssl/cert.pem
Save the files before close.

Aether - Blog & Magazine ghost theme
Aether is a captivating blog and magazine ghost theme meticulously crafted to enhance the online presence of your blog or magazine and take it to new heights.
Its adaptable and responsive design makes it an ideal choice for bloggers, writers, publishers, and entrepreneurs seeking to build visually captivating and user-friendly blogs or magazines using ghost cms that deeply resonate with their audience.
Configuring your ghost publication NGINX Server Block
Let's find your existing Nginx config file for your Ghost Publication first. It should be under the following directory & named something like www.yourdomain.com.conf
/etc/nginx/sites-available/www.yourdomain.com.conf& The configuration should be like below
server {

    server_name yourdomain.com www.yourdomain.com;
    root /var/www/ghost/system/nginx-root; # Used for acme.sh SSL verification (https://acme.sh)

    location / {
        proxy_set_header X-Forwarded-For $proxy_add_x_forwarded_for;
        proxy_set_header X-Forwarded-Proto $scheme;
        proxy_set_header X-Real-IP $remote_addr;
        proxy_set_header Host $http_host;
        proxy_pass http://127.0.0.1:2368;

    }

    location ~ /.well-known {
        allow all;
    }

    client_max_body_size 50m;

    listen [::]:443 ssl; # managed by Certbot
    listen 443 ssl; # managed by Certbot
    ssl_certificate /etc/letsencrypt/live/yourdomain.com/fullchain.pem; # managed by Certbot
    ssl_certificate_key /etc/letsencrypt/live/yourdomain.com/privkey.pem; # managed by Certbot
    include /etc/letsencrypt/options-ssl-nginx.conf; # managed by Certbot
    ssl_dhparam /etc/letsencrypt/ssl-dhparams.pem; # managed by Certbot

}
server {
    if ($host = yourdomain.com) {
        return 301 https://$host$request_uri;
    } # managed by Certbot


    listen 80;
    listen [::]:80;

    server_name yourdomain.com;
     return 404; # managed by Certbot


}
Now replace your Existing config with the following configuration
server {
  listen 80;
  listen [::]:80;
  server_name yourdomain.com www.yourdomain.com;
  location / { return 301 https://$host$request_uri; }
}

server {

  server_name yourdomain.com www.yourdomain.com;

  listen 443 ssl http2;
  listen [::]:443 ssl http2;
  ssl_certificate         /etc/ssl/cert.pem;
  ssl_certificate_key     /etc/ssl/key.pem;

  location / {
        proxy_set_header X-Forwarded-For $proxy_add_x_forwarded_for;
        proxy_set_header X-Forwarded-Proto $scheme;
        proxy_set_header X-Real-IP $remote_addr;
        proxy_set_header Host $http_host;
        proxy_pass http://127.0.0.1:2368;
        }

client_max_body_size 100M;

}
Save the file & test nginx config
sudo nginx -tAfter the Nginx configuration test successfully restart nginx
sudo systemctl restart nginx& you are done.
Your ghost publication now will serve via CloudFlare SSL & you don't need to worry about the renewal of the certificate.
Source: https://thesaleheen.com/replace-letsencrypt-ssl-with-cloudflare-ssl-for-your-ghost-publication/